Mostrando entradas con la etiqueta Sculpture Tutorial. Mostrar todas las entradas
Mostrando entradas con la etiqueta Sculpture Tutorial. Mostrar todas las entradas


How to make xmas tree, pineapple and strawberry with the 'kanzashi' fold.

To make these things (in pic.1) you need to know how to do the kanzashi folds #1 and#2.
1/ Kanzashi fold #1:
1/ Kanzashi fold #1:

Cut a square piece of grosgrain ribbon. fold it in half at the broken line shown in pic.2

Continue to fold the folded ribbon in half once more at the broken line shown in pic.3

Now as you see in pic.4 at one corner of your folded ribbon now, there are two layers. Fold the top layer on top of the other part, at the broken line shown in pic.4, following the arrow.

Now do the similar thing with the bottom layer but bring it underneath the other part instead. In pic.5 Imark some spot with A, B, C. Those A, B, C will stay at the same places through out next steps, so you can compare and have an idea what is what while we're moving on.

Now as you see in pic.4 at one corner of your folded ribbon now, there are two layers. Fold the top layer on top of the other part, at the broken line shown in pic.4, following the arrow.
Now do the similar thing with the bottom layer but bring it underneath the other part instead. In pic.5 Imark some spot with A, B, C. Those A, B, C will stay at the same places through out next steps, so you can compare and have an idea what is what while we're moving on.
Now you have what is shown in pic.6. Use the lighter to melt the ribbon along AB. Once the edges of all layer along AB have melt evenly, use you fingers to press firmly and squeeze to seal them together. You would want to wrap your fingers with cotton bandage before doing this step otherwise your fingers may be hurt by the melted ribbon. YOu will now achieve what is shown in pic.7.

Pic.8 show your folded ribbon from another angle. (Please not that A, B, C stay in the same places!!!:-))

Now use your thumb and index finger to open your ribbon as shown in Pic.8

Pic. 9a show you the front side of the kanzashi fold #1

And Pic. 9b show you the back of it.
Pic.8 show your folded ribbon from another angle. (Please not that A, B, C stay in the same places!!!:-))
Now use your thumb and index finger to open your ribbon as shown in Pic.8
Pic. 9a show you the front side of the kanzashi fold #1
And Pic. 9b show you the back of it.
2/ Kanzashi fold #2:

Do the same as the fold#1 until Pic.3. Now instead of folding only the top layer, you will fold both top and bottom layer to one side at the broken line and following the arrow in Pic.4. Pic.12 show what you'll get

Use the lighter to seal the edges of all ribbon layers along AB, with the same methode as described after Pic.6

You now have what is shown in Pic.13

Now, Pic.14 shows you the top of the kanzashi fold#2

Use your finger to open it a bit, the same way as you do the fold #1

Pic 16 shows you the back of it.
Do the same as the fold#1 until Pic.3. Now instead of folding only the top layer, you will fold both top and bottom layer to one side at the broken line and following the arrow in Pic.4. Pic.12 show what you'll get
Use the lighter to seal the edges of all ribbon layers along AB, with the same methode as described after Pic.6
You now have what is shown in Pic.13
Now, Pic.14 shows you the top of the kanzashi fold#2
Use your finger to open it a bit, the same way as you do the fold #1
Pic 16 shows you the back of it.
I make the tree here with 7/8" ribbon, so the size of the tree will be about 1.5" standing up. you can also make it with 1.5" ribbon , of course it'll be bigger - up to you :-)
You will need 6 Kanzashi 'tiles ' fold #1, and one in brown, fold #1, too (Pic.17)

A piece of fun foam (Pic.18) and some ornaments for the tree as desired. I use a red star cut out of fun foam. But you can use anything that pleases your eyes. If you want to make a 3D ribbon star, I think I posted one for the starfish here, and instead of a 'funky' star, you need to cut a neat, even one for the tree, but the methode will be the same :-)
http://hipgirlclips.com/forums/how-m...-starfish.html
YOu also need hot glue and hot glue gun and a pair of scissors.

Now put some hot glue to the back of the brown piece and glue it onto the fun foam as pictured (Pic.19)

Continue to glue the green 'tiles' onto the fun foam step by step as shown in pic.20, 21, 22


Now, use your scissors to trim of the funfoam shown underneath the tree (Pic.23)

Now glue an ornament onto the top of the tree (Pic.24) . YOu've made it!

4/ Pineapple:
You will need 7 Kanzashi 'tiles ' fold #1 in orange or yellow gold, swiss dots ribbon will do nicely , and 7 in green, fold #2,(Pic.25) and a piece of fun foam

Glue two kanzashi tiles fold #2 together as shown in pic.26,27


Apply hot glue to the back of this piece and glue it on to the fun foam (Pic.28,29)


Now continue to glue the rest 'tiles' onto the fun foam step by step as shown in pic.30,31,32,33,34,35,36,37,38


Now trim off the fun foam. You've made your pineapple (Pic.39)

You will need 6 Kanzashi 'tiles ' fold #1, and one in brown, fold #1, too (Pic.17)
A piece of fun foam (Pic.18) and some ornaments for the tree as desired. I use a red star cut out of fun foam. But you can use anything that pleases your eyes. If you want to make a 3D ribbon star, I think I posted one for the starfish here, and instead of a 'funky' star, you need to cut a neat, even one for the tree, but the methode will be the same :-)
http://hipgirlclips.com/forums/how-m...-starfish.html
YOu also need hot glue and hot glue gun and a pair of scissors.
Now put some hot glue to the back of the brown piece and glue it onto the fun foam as pictured (Pic.19)
Continue to glue the green 'tiles' onto the fun foam step by step as shown in pic.20, 21, 22
Now, use your scissors to trim of the funfoam shown underneath the tree (Pic.23)
Now glue an ornament onto the top of the tree (Pic.24) . YOu've made it!
4/ Pineapple:
You will need 7 Kanzashi 'tiles ' fold #1 in orange or yellow gold, swiss dots ribbon will do nicely , and 7 in green, fold #2,(Pic.25) and a piece of fun foam
Glue two kanzashi tiles fold #2 together as shown in pic.26,27
Apply hot glue to the back of this piece and glue it on to the fun foam (Pic.28,29)
Now continue to glue the rest 'tiles' onto the fun foam step by step as shown in pic.30,31,32,33,34,35,36,37,38
Now trim off the fun foam. You've made your pineapple (Pic.39)
4/ Strawberry:
You will need 6 Kanzashi 'tiles ' fold #1 in red, swiss dots ribbon will do nicely (sorry I was not keen enough to find my red ribbon in my too messy stash so I use this hot pink. Don't worry, you just need to do the same with the red one :-) J/k) , and 3 in green, fold #2,(Pic.25) and a piece of fun foam.
The following pics will show the order to glue those tiles onto the funfoam. Once you finish, again, trim off the exccess fun foam.


INFO TAKEN FROM HERE
THE END.
You will need 6 Kanzashi 'tiles ' fold #1 in red, swiss dots ribbon will do nicely (sorry I was not keen enough to find my red ribbon in my too messy stash so I use this hot pink. Don't worry, you just need to do the same with the red one :-) J/k) , and 3 in green, fold #2,(Pic.25) and a piece of fun foam.
The following pics will show the order to glue those tiles onto the funfoam. Once you finish, again, trim off the exccess fun foam.
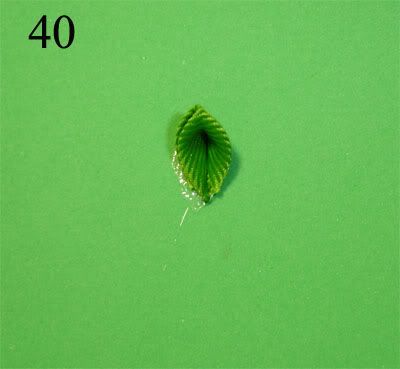
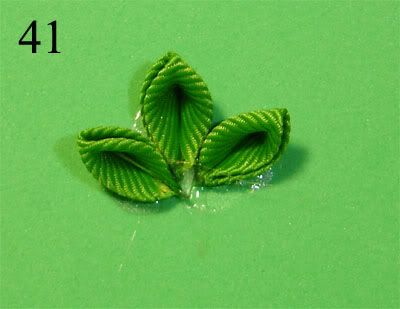
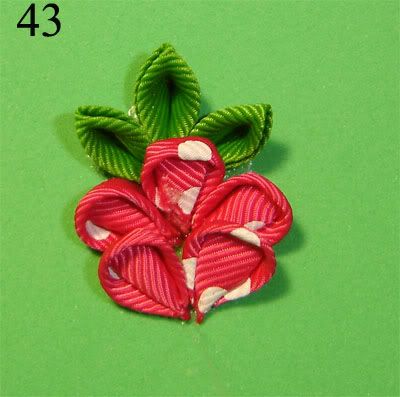

INFO TAKEN FROM HERE
THE END.
Minnie Mouse Ribbon Sculpture Tutorial

TKS TO 
Here’s what you need:

You’ll also need ⅜” Swiss Dots Ribbon for the bow:

You can use what ever color and style you’d like for the bow. I just did mine to match the rest of
the bow
the bow
Now for the instructions. After I cut and heat sealed each piece (which BTW you can use a
lighter or one of these fancy, dancy heat sealing tools) I hot glued them together. For the body,
starting with the small one first, I hot glued it in a circle.
lighter or one of these fancy, dancy heat sealing tools) I hot glued them together. For the body,
starting with the small one first, I hot glued it in a circle.

Then I glued the middle one to the small one. Here’s a tip: it’s easier if you glue the first piece
to the top of the small circle then wrap it around in a circle. It should look like this:
to the top of the small circle then wrap it around in a circle. It should look like this:

Finally, glue the longest piece. And here is the body:

Do the same with the ears…

and put them on the sides with the ribbon ends on the body and you have Mickey!

Now if you want Minnie, just take the other piece of ribbon and make a bow.

Glue it on the front (or the side, whichever you prefer).

Again, you can stick it on a lined clip and it would look SO cute!

OR…
You could put it on a bow! This is my favorite and most popular way.

Suscribirse a:
Entradas (Atom)