Mostrando entradas con la etiqueta Hradbands. Mostrar todas las entradas
Mostrando entradas con la etiqueta Hradbands. Mostrar todas las entradas


HOW TO MAKE FABRIC FLOWERS {16 PATTERNS & TUTORIALS}
With these fabric flower tutorials and patterns you can embellish practically anything like shirts, purses, shoes, and your hair. {{squeal in delight}}
* I’m re-posting one of my favorite fabric flower tutorials today because I’m busy working on a fun project that I hope you’ll love. {{crossing fingers}}

Fabric Flowers
1. Flower headband and hair clip tutorial
2. Fabric Flower pin tutorial
3. Scrappy corsage
4. Fabric flower by Lex
2. Fabric Flower pin tutorial
3. Scrappy corsage
4. Fabric flower by Lex

Free Patterns
5. Felt flower headband with pattern
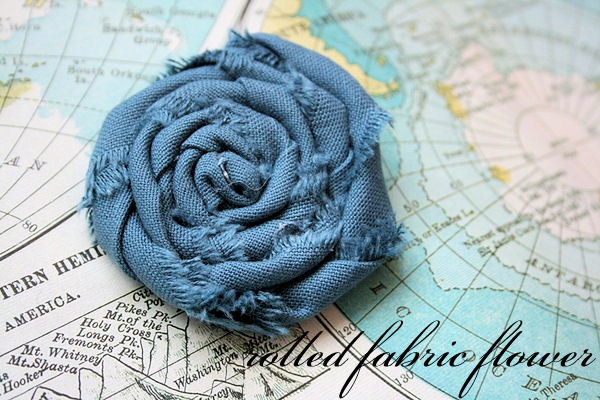
6. DIY fabric posies and roses tutorial
7. Lace embellished fabric flowers and how to use them
8. How to Make Flowers Using a Vintage Flower Loom
6. DIY fabric posies and roses tutorial
7. Lace embellished fabric flowers and how to use them
8. How to Make Flowers Using a Vintage Flower Loom

Tutorials
9. Leather fabric flower
10. Fan flower tutorial for embellishments
11. Recycled Paper Flower Gift Bows
12. Paper folding flowers – gift packaging
10. Fan flower tutorial for embellishments
11. Recycled Paper Flower Gift Bows
12. Paper folding flowers – gift packaging

13. No Sew Fabric flowers
14. Flower folds flower pin tutorial
15. Flower pattern to use as embelishments
16. Button flower hair pin tutorial
14. Flower folds flower pin tutorial
15. Flower pattern to use as embelishments
16. Button flower hair pin tutorial
More Fabric Flowers from Tip Junkie:
- How-to Make Flowers out of Sheet Metal
- Jewelry Fashion Accessories
- Fabric Flower Tutorial
- Fabric Flower Tutorials


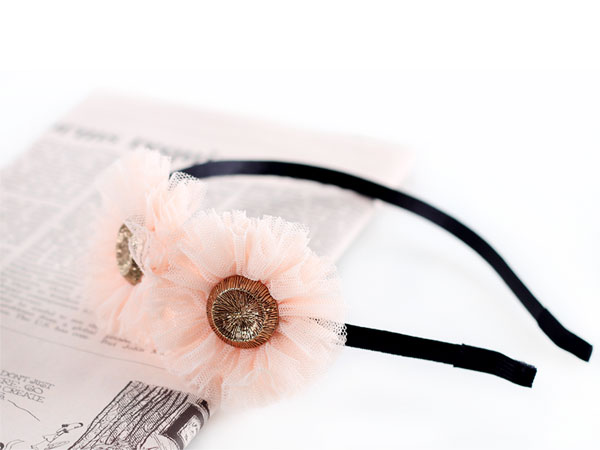
Interchangable Fabric Flower Headband Tutorial!

To make the headbands you'll need:
- headbands
- fabric scraps (for the red and white headband I used a jersey knit and for the orange and turquoise headband I used a calico)
- velcro
- felt
- hot glue gun
- beads or buttons and needle and thread (optional)
First, cut your fabric into strips. I make mine about 1 1/2 inches wide. The strips don't have to be cut straight - you won't be able to tell once you've made them into a flower. Make the strips long (like length of the fabric long). Once you're happy with the size of the flower, you can cut the excess off.
 Fold the strip in half and make a knot at one end.
 Hold the knot in your hand (the short end of the fabric facing down). Put a dab of hot glue on the side of the knot and attach the long part of your tail to it. This is the start of your flower.
 Now, give the fabric a half twist. (The fold of the fabric strip will be facing down and the two cut ends will be facing up). Glue to the knot/flower. Give the fabric strip another half twist (now the fold will be facing up and the two cut ends will be facing down). Glue. Continue to twist and glue until the flower is a size you are happy with.
Tip: If you put the dab of hot glue toward the bottom of the flower, you'll be less likely to see the glue on the top of the flower. Don't use a lot of glue. A small dab is all you'll need and will prevent it from oozing up to the top of the flower.
 You should end up with something that looks like this. Tuck the end underneath the flower and secure with a little bit of hot glue.
 Once you've made all your flowers, cut the tail of the knot off. Now you can embellish with beads and buttons if you'd like. I use seedbeads and hand sew them on. A thimble comes in handy for this part! Now, play around with the flowers to find an arrangement that you like.
 Cut a piece of felt in a rough oval shape that is slightly smaller than the arrangement of flowers that you've decided on. Glue the flowers to your felt oval.
 Now that your flowers are glued to your felt oval, cut a small pieceof velcro and glue it on the back of the felt. I like to put the soft side of the velcro on the flowers, but it doesn't really matter.
 The other side of the velcro gets hot glued to the headband.
 Cut a small piece of felt the same size as the velcro piece and glue it to the back of the velcro. Your headband will be sandwiched between the velcro and the felt.
 Now you can attach your fabric flowers to your headband!

Voila! A cute, interchangeable fabric flower headband!

 You should end up with something that looks like this. Tuck the end underneath the flower and secure with a little bit of hot glue.
 Once you've made all your flowers, cut the tail of the knot off. Now you can embellish with beads and buttons if you'd like. I use seedbeads and hand sew them on. A thimble comes in handy for this part! Now, play around with the flowers to find an arrangement that you like.
 Cut a piece of felt in a rough oval shape that is slightly smaller than the arrangement of flowers that you've decided on. Glue the flowers to your felt oval.
 Now that your flowers are glued to your felt oval, cut a small pieceof velcro and glue it on the back of the felt. I like to put the soft side of the velcro on the flowers, but it doesn't really matter.
 The other side of the velcro gets hot glued to the headband.
 Cut a small piece of felt the same size as the velcro piece and glue it to the back of the velcro. Your headband will be sandwiched between the velcro and the felt.
 Now you can attach your fabric flowers to your headband!
Voila! A cute, interchangeable fabric flower headband!

Burnt Petal Flower
 This flower always gets a lot of comments. It looks complicated, but it’s not.
–Supplies–
Ribbon
Button
Lighter or Candle
Needle and Thread
Felt Circle
Single prong clip
3/8″ Ribbon (to line your clip)
Hot Glue Gun

Button
Lighter or Candle
Needle and Thread
Felt Circle
Single prong clip
3/8″ Ribbon (to line your clip)
Hot Glue Gun
First cut out some petals. The bottom of the petal should be the edge of the ribbon, you won’t need to burn it because it is already sealed. As you can see I did not worry about making my petals the same. Real life flowers aren’t perfect. 
If you want, you can make a petal pattern and make all your petals the same. It would probably work best to use a pattern if you are going to do a 5 petal flower.
Most of the time I make my flowers with around 20 petals. This just makes them nice and full.

Burn each petal using a lighter or candle. The more you burn it, the more the petal will curl up.

With a needle and thread stitch along the bottom edge of each petal, connecting them together,

Take the needle through the back of the petal.
Put the needle back through the center of the front and come back up very close to the center.
Finish by taking the needle through the front again. I know this sounds so confusing. LOL
The picture is much better at explaining. If you don’t do it this way it will probably look fine anyway.
 Once you have stitched all your petals, pull your thread tight, gathering them together, and shape it to the way you want it. Take a couple stitches in the back to secure the flower.
Glue a felt circle to the back to hide any stitching and secure the flower even more.
Glue a button in the center of your flower. I used a button from my Flirtation Button Jar. Attach the flower to a lined Single Prong Clip, and you are ready to ROCK & ROLL!
Play around with different sizes, colors, and ribbon types.
 This flower is made with Chalk Violet Solid Grosgrain Ribbon. I cut these petals to a point.
 I alternated Sarsparilla and Black petals out of 1 1/2″ Satin Ribbon for this flower.
 I love this flower in Red Solid Grosgrain Ribbon, so classic.
Look how cute it looks on my baby girl!
You can make these flowers any size with however many petals you want. Have fun deciding how to make yours!
FROM


COMO TERMINAR LA FLOR..?? HOW I FINISH MY FLOWER


GRACIAS
flower head bands
My friend had a baby shower so I decided to make some homemade gifts.

I love these cute flowers, I can't get enough.

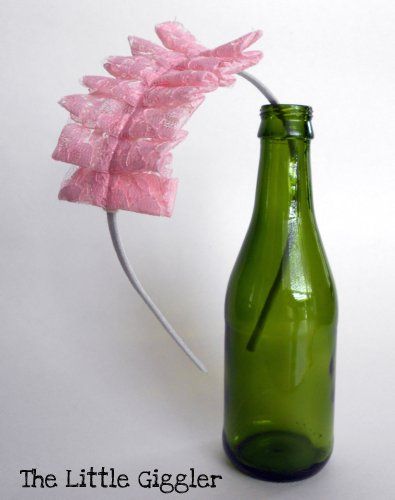
For this one I started with a piece of felt cut into a circle and glued some tule to it.

Then I adjusted the stitch length to 4.5 to gather the fabric

Then you just wind it into a circle

This time I'm just going to turn it over and apply glue (hot glue) all over the bottom of it then place it on the felt circle.

There, that makes it clean, fast and easy. (you'll see the flower if I turn it over)

So I love it! and I just attached it to some white cotton that I made into a head band.

To make this one I just attached tule to the top of it and gathered it all together at the same time.

And here is a picture of how to gather in case there is someone out there that does not know how. You just pull the string after you have sewn it on the longest stitch length.
Suscribirse a:
Entradas (Atom)